The Plan
One of my first ideas for this project was to create an explorable indoor space that has three cinema rooms. In each room would be the same video playing, except it would be colour graded differently to change the theme and feeling it gives the viewer. For example, sepia for a vintage film, or saturated/neon colour for a futuristic style. Ambient sounds in each room would accompany the videos to enhance the effect. I really liked this idea because I thought it would be something I would attend. A showcase of how video and sound design can change your experience of the same film, but in an intimate microcinema format with indie films. However, I considered the time constraint and decided it was too high of a scope to develop this idea, considering there were a few new things I would need to learn as well, such as colour grading in video editing software. So I put that idea on the back burner.
The concept I ended up going with was to create a rotating, multi-sided cinema. I came up with this idea thanks to a few of the class tutorials in our studio. Rather than designing a space the player could explore using a typical first-person controller, it was just going to be one object that they would rotate using click and drag controls.
The Process
I started with creating the cinema object, which was a basic cube scaled to the same size as a 9:16 video. I added the ClickToRotate script (thanks Liam) and four planes to each side of the cube, which all had a video attached. I decided I was going to use my own videos I had taken on my phone of my two cats, Jasper and Jinxx. A couple of the videos needed to be edited in Premiere to cut down to the important parts and to keep them all around 30 seconds long.
I played around with the lighting of the scene and the background using the general lighting settings, directional and spot lights, various materials and enclosures using walls, but didn’t like anything that I tried. Eventually I ended up back to basics with just a directional light on minimal intensity and a solid background colour.
I figured it wouldn’t make sense if you could hear sound coming from a video you couldn’t see, so I added a script that used trigger colliders to unmute the video as you enter and mute it as you leave. I used Box Colliders on each of the plane objects and positioned them so that they would not get in the way of the camera’s rotate collider. I got stuck on this for a good hour or so before finally realising I just needed to add a Rigidbody component to the cube I was using to trigger the colliders, which sits just behind the camera object and is a child of the rotator so it moves with it. See screenshot below of the set up.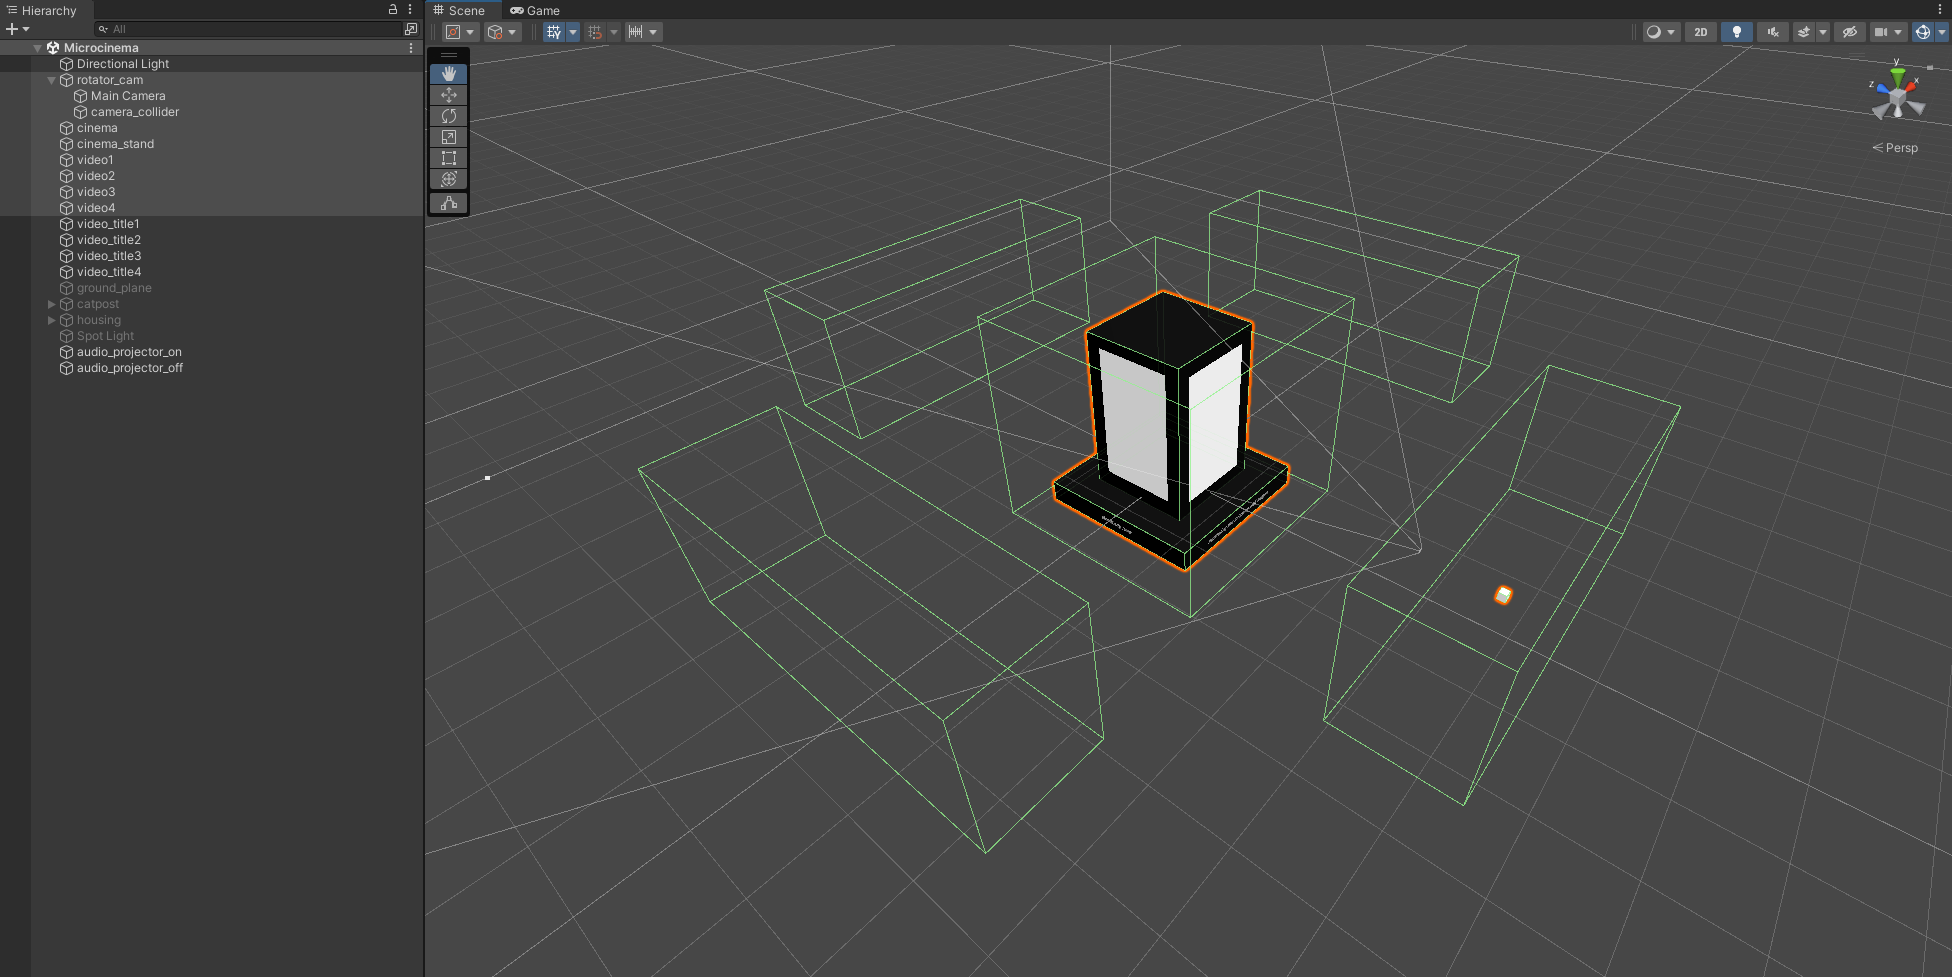
public class MuteVideo : MonoBehaviour
{
    VideoPlayer vid;

    void Start()
    {
        vid = gameObject.GetComponent<VideoPlayer>();
    }

    void OnTriggerEnter()
    {
        vid.SetDirectAudioMute(0, false);
    }

    void OnTriggerExit()
    {
        vid.SetDirectAudioMute(0, true);
    }
}
I added a platform below the cinema so that I could display a title for each video, which I later animated to fade in and out using the colliders again in a separate script called ShowVideoTitle. It’s currently dependant on the framerate for the fade in and out timing, but I think it might be better to use real time instead.
public class ShowVideoTitle : MonoBehaviour
{
    public bool videoInView;
    public TextMeshPro videoTitle;
    public Color visibleColor;
    public Color hiddenColor;

    float fadeTime = 2f;

    void Start()
    {
        videoTitle.color = hiddenColor;
    }

    void OnTriggerEnter()
    {
        StartCoroutine(ShowText());
    }

    void OnTriggerExit()
    {
        StartCoroutine(HideText());
    }

    IEnumerator ShowText()
    {
        for (float t = 0.01f; t < fadeTime; t += 0.01f)
        {
            videoTitle.color = Color.Lerp(hiddenColor, visibleColor, t / fadeTime);

            yield return null;
        }
    }

    IEnumerator HideText()
    {
        for (float t = 0.01f; t < fadeTime; t += 0.01f)
        {
            videoTitle.color = Color.Lerp(visibleColor, hiddenColor, t / fadeTime);

            yield return null;
        }
    }
}
I searched online for old film projector sound effects. I got really lucky and found an excellent recording on freedsound.org that included the sound of the projector turning on and then a good quality, continuous whirring after. This was exactly what I was wanting for the rotating interaction. I also found another sound effect on Zapsplat for the projecting turning off. I added these sounds to the ClickToRotate script, and I also changed the direction of the rotation so that it feels like you’re spinning the cinema itself.
// original ClickToRotate.cs script by Liam Gibbons,
// edited to change rotate direction and add sound effects

public class ClickToRotate : MonoBehaviour
{
	public float sensitivity = 0.05f;
	Vector3 mouseReference;
	Vector3 mouseOffset;
	Vector3 rotation;
	bool isRotating;

	public AudioSource projectorOn;
	public AudioSource projectorOff;

	void Start ()
	{
		rotation = Vector3.zero;
	}

	void Update()
	{
		if(isRotating)
		{
			mouseOffset = (Input.mousePosition - mouseReference);
			rotation.y = (mouseOffset.x + mouseOffset.y) * sensitivity;
			transform.Rotate(rotation);
			mouseReference = Input.mousePosition;
		}
	}

	void OnMouseDown()
	{
		isRotating = true;
		mouseReference = Input.mousePosition;

		// play "projectorOn" sound
		projectorOn.Play();
	}

	void OnMouseUp()
	{
		isRotating = false;

		// stop playing "projectorOn" sound
		projectorOn.Stop();
		// play "projectorOff" sound
		projectorOff.Play();
	}
}
The Outcome
I made a few final adjustments to the colour in the scene and increased the volume of all the videos so that they had greater precedence over the rotation sound effects. I think by default, sound recorded on a phone is very quiet. I had to increase the volume by around 12dB to 15dB in Premiere for each video.
I’m surprised with the outcome of this project. I had low expectations after deciding to go with a simpler idea, but it turned out really cool. There’s a lot I could build on from here, such as having multiple cinemas that could swap out using a button, but I’m happy with what it is at the moment.